


These VOTE Sugar Cookies use a couple of royal icing decorating techniques for using royal icing on cookies! The techniques are shown step-by-step in the video tutorial.
What you'll need to make these VOTE sugar cookies:
- One batch sugar cookie dough
- One batch royal icing in white, grey, red, blue and black
- Wafer paper (1 to 3 sheets, depending on how many cookies you are making)
- VOTE Cookie Cutter from my Etsy Shop
- 5 Piping bags
- Piping tips, if desired
- Gold star sprinkles
- Downloaded designs (found below)


Decorating Techniques with Royal Icing on Cookies
I have used two techniques to decorate these cookies and both of them make cookie decorating easy and accessible!
Rosie the Riveter
The cookies with Rosie the Riveter on them are some of my favorites so far! I love Rosie and have wanted to put her on a cookie for a long time!
But I'm am not much of an artist, especially when using royal icing on cookies. I do a decent job drawing on paper with a pencil AND ERASER!
But drawing on a cookie is much more permanent! So I decided to try using wafer paper!
This technique ended up being so easy! I may try it again on wet royal icing on cookies and see how it works.
Tracing the design only took seconds. I would recommend a finer tip than the one used in the video. Mine was dried out so I had to use the larger one.
The only thing that I didn't love about this technique is that the paper doesn't dissolve when it is attached with corn syrup as shown in the video. That is the reason that I will try with wet icing.
The difficulty with laying the wafer paper on wet royal icing is that it will be impossible to reposition it if my hand slips even a little! On dry royal icing, the wafer paper can be adjusted if needed.
Royal Icing Transfer on Cookies
Making Royal Icing Transfers may be the easiest technique that I have ever used on a cookie.
Printing the design on paper allows you to make any design you choose! The possibilities are endless!
I tend to make a few extra's with this technique because they can break when you peel them off the parchment or wax paper. But transfers are so forgiving and allow you to experiment without messing up a cookie!
The royal icing should be slightly thicker than flood consistency for royal icing transfers for designs that are flooded. A stiff consistency is great for words and small details.
Practicing with the icing is the best way to learn this technique! And the best part is that your cookies will only have the best decorations because you can just discard the mistakes!
Download the VOTE design to create the royal icing transfer here:
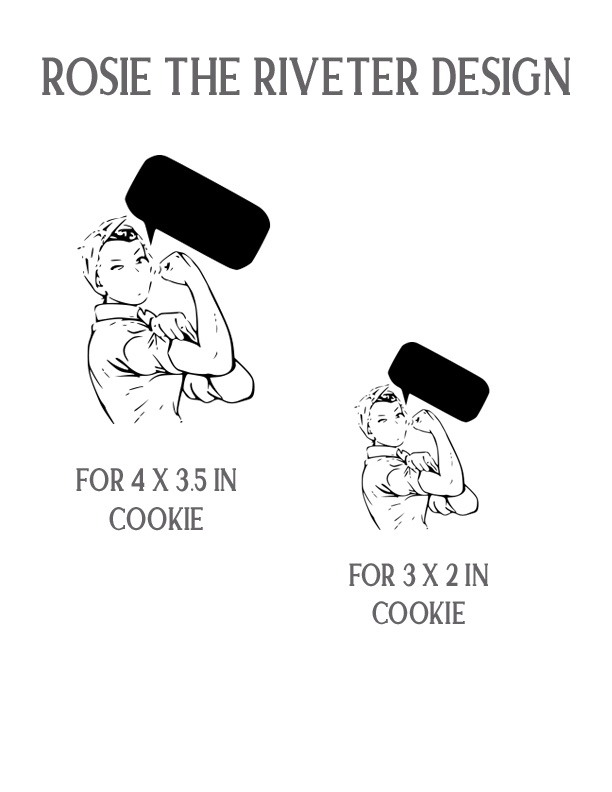
Download the Rosie the Riveter design to trace here:
3D Printed Cookie Cutters
My husband has introduced me to 3d printing and that may have been a mistake! I can print any shape I want or need! I have started listing a couple of cookie cutters on Etsy and will post more videos soon!
Check out my Etsy shop here:
https://www.etsy.com/listing/863246528/vote-election-cookie-cutter-fondant?ref=shop_home_active_1
Watch the full video tutorial to see step-by-step how to make these cookie designs!

Sugar Cookies
18
servings10
minutes10
minutesIngredients
- Vanilla Sugar Cookies
226 grams (1 cup) unsalted butter, at room temperature
200 grams (1 cup) granulated sugar
1 large egg, at room temperature
1 Tablespoon vanilla extract
2 Tablespoons milk, any kind
375 grams (3 cups) all-purpose flour
¾ teaspoon baking powder
½ teaspoon salt
- Royal Icing
900 grams (2 pounds) powdered sugar (also called confectioners or icing sugar)
156 grams (5.5 ounces) pasteurized egg whites
¼ teaspoon cream of tartar
1 Tablespoon light corn syrup
Gel colors of your choice
Directions
- In a large bowl or the bowl of a stand mixer, beat the butter and sugar on medium speed until smooth and creamy. Beat in the egg, vanilla, and milk until well blended.
- Combine the flour, baking powder, and salt in a medium bowl. Gradually add to the butter mixture on low speed until combined. Divide the dough in half and wrap in plastic wrap. Chill for 1 hour or up to 3 days.
- Preheat your oven to 375ºF/190ºC. Roll one piece of dough at a time between two pieces of parchment paper or on a floured countertop. Roll to your desired depth, which will depend on the cutters you are using and the final product you desire. Cut dough with floured cookie cutters. Place 1-inch apart on silpat or parchment-lined baking sheets.
- BAKE 5 to 9 minutes or until edges begin to brown. Cool 2 minutes. Remove to wire rack to cool completely. Decorate as desired.
- To make the royal icing
- In the bowl of a stand mixer, add the powdered sugar and cream of tartar and whisk together to combine. Add the egg whites and corn syrup and stir gently with a rubber spatula until the powdered sugar is moistened.
- Put the bowl on the stand mixer and, using the whisk attachment, whisk for 1 to 2 minutes until smooth and bright white in color.
- At this point, you can use the icing to assemble a gingerbread house. To use the white icing, you will need to thin the icing as directed below.
- **To outline shapes or cookies for flooding, put about 1 cup of the royal icing in a small bowl and add about ½ teaspoon water. Add another ½ teaspoon if needed to allow smooth piping. Stir until smooth and combined.
**To flood cookies inside the dried outline, put about 1 cup of the royal icing in a small bowl and add about 1 teaspoon of water. Add another ½ teaspoon water to allow smooth spreading. Stir until smooth and combined.
**Color as desired.


Leave a Reply